Quick Installation Guide

CP-H27/CP-H27B

Thank you for choosing CP Plus Dashcam

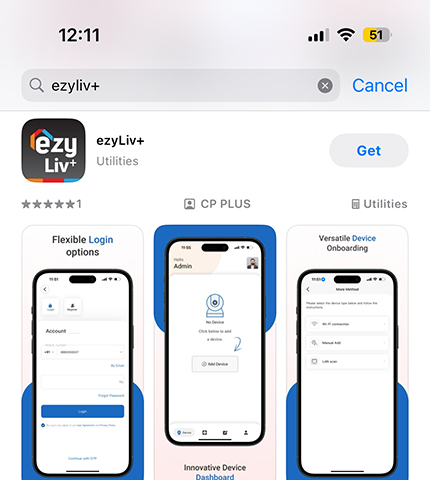
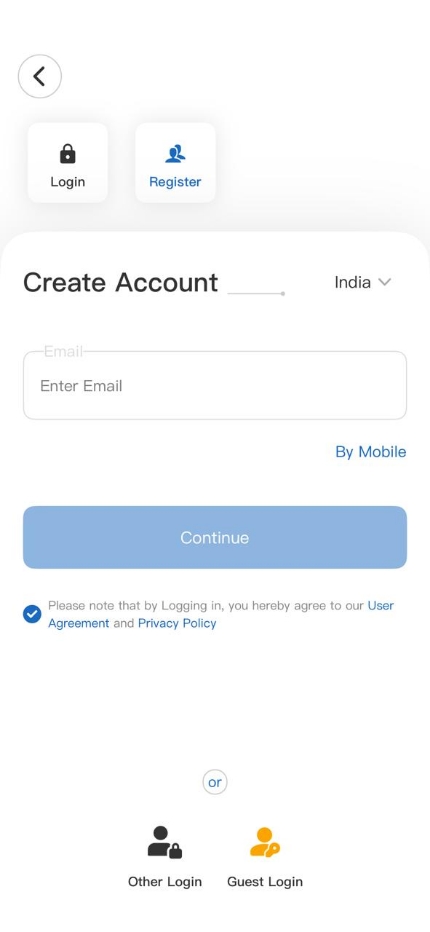
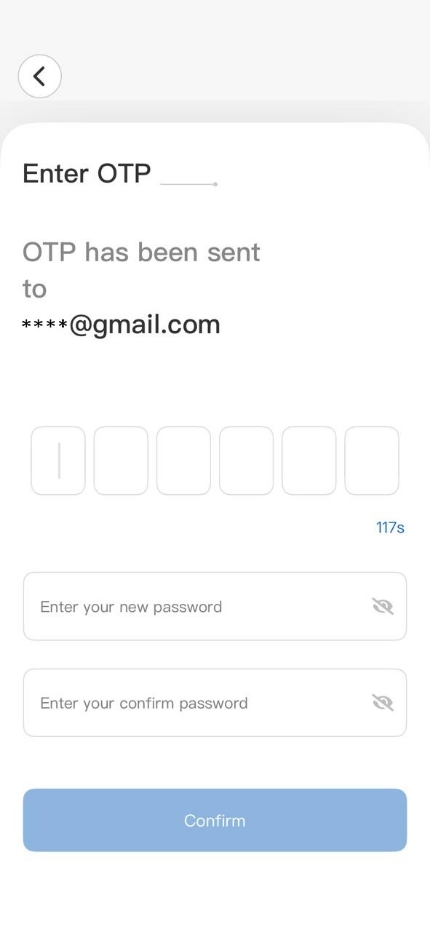
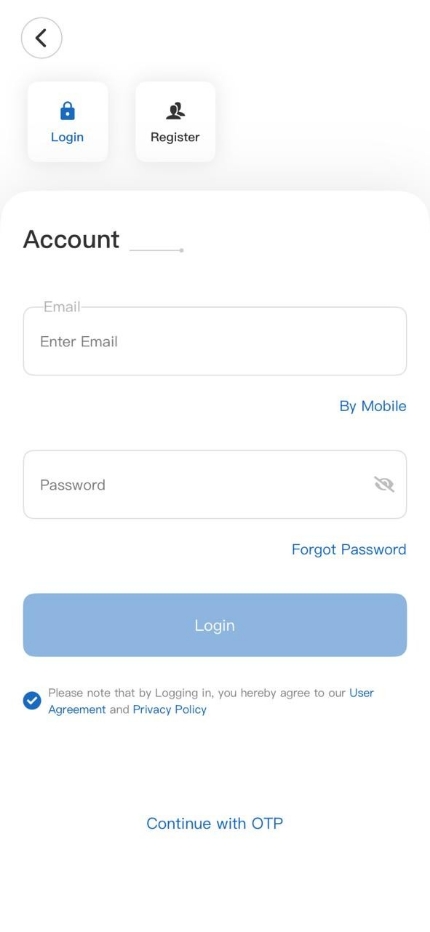
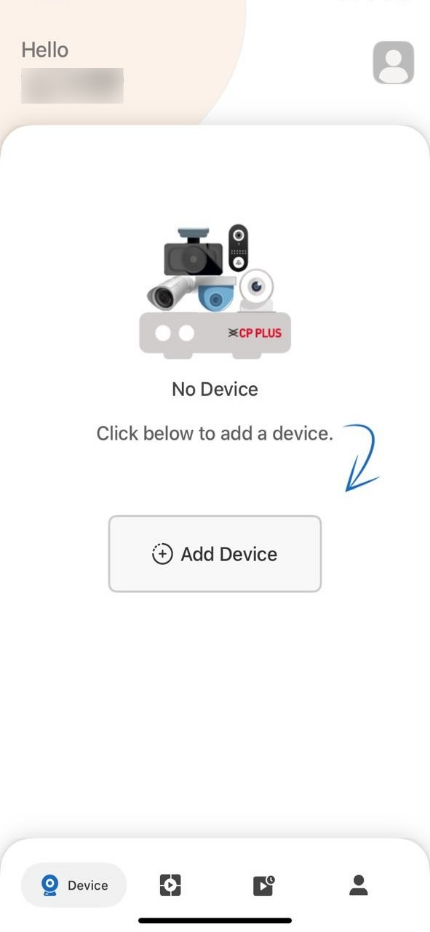
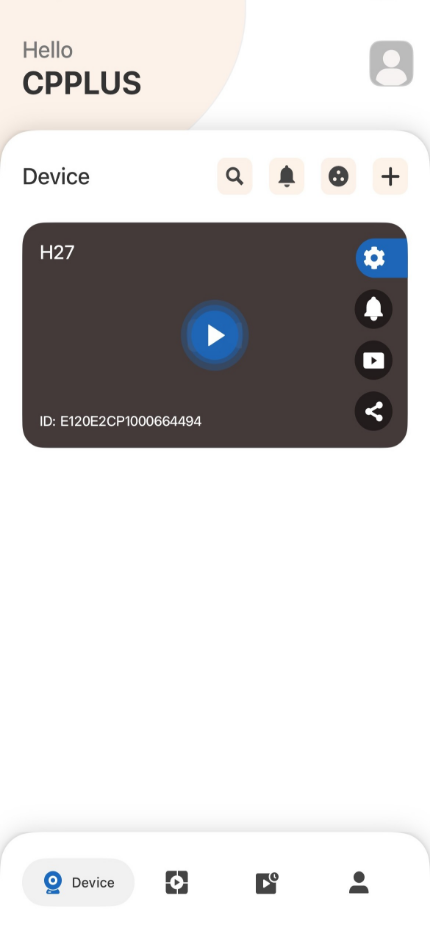
Get Started using your new devices by downloading ezyLiv+ app, one convenient app that manages everything straight from your smart phone. Easily connect to 4G/5G SIM network and control multiple devices from the touch of your fingertips.

Note:

  • Please read this manual carefully before using the product.
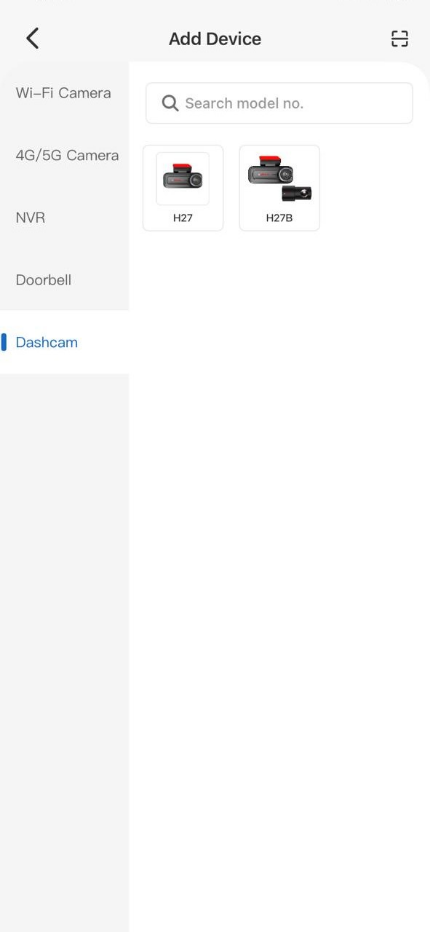
  • The CP-H27 and CP-H27B are essentially the same device. The key difference is that the CP-H27 includes only a front camera, while the CP-H27B is a dual-channel device with both front and rear-cameras.
  • Dashcam

  • Car charger

  • Type-C Power Cable

  • Cable clip

  • Mounting Bracket

  • Pry Tool

  • Electrostatic Sticker

  • Scan QR Code to Download Quick Installation Guide

  • Note: The actual product may differ from the images shown above.

Get Ready

  • Ensure the SIM card is inserted correctly.
  • Confirm that your data plan is active and supports 4G connectivity.
  1. Download the ezyLiv+ app from App Store or Google Play.

    • Scan QR Code to Download
      Mobile App

  2. Register your account on ezyLiv+ application.

    • STEP 1

      Select the country

      Enter the email ID/Mobile no. to continue the registration.

    • STEP 2

      Enter the verification code
      and create a password.

  3. Login

    • 1. Enter the mobile number or email ID already used during registration.
    • 2. Enter the password.
    • 3. Click Login.
    • Note: You can also continue login with OTP.

  4. Add Device

    • Select Add Device > Select Dashcam > Choose your device model no.
    • Note:

    • Enable the prompts.
    • Ensure the Dashcam is powered on and connected to the 4G Network before proceeding.
    • Select Next.
    • Scan the cloud QR code located on the back side of the device's sticker.

      Note: The above image is for reference only.

    • After scanning, the device will take a few moments to register on the server. Once registered, it will appear online, allowing you to access the live view.
    • Optionally, rename the device, then select Confirm to complete the setup.
    • Once a device is added, tap the Play icon to check its current location on the map. To view the live stream, tap the Go Live icon.

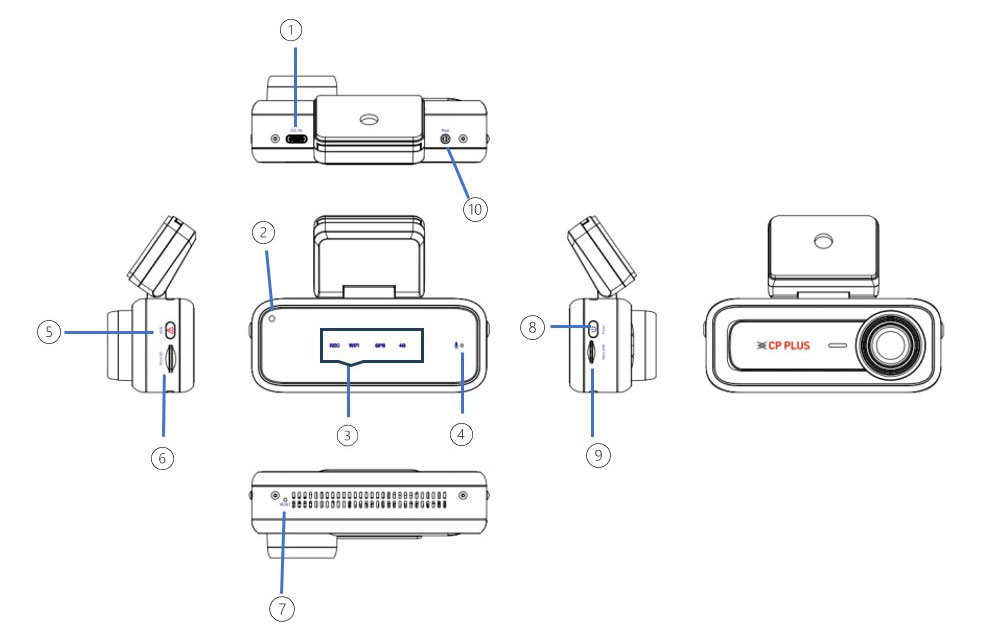
Overview of the Dashcam

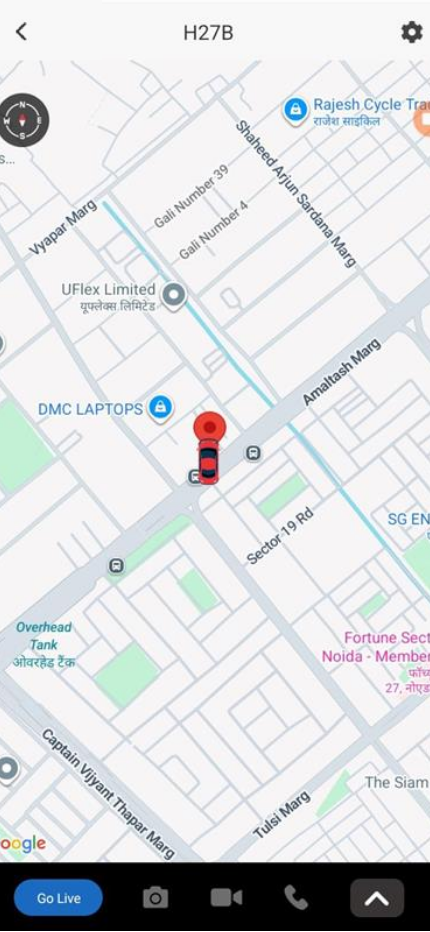
The Dashcam CP-H27/B is a Full HD resolution dashcam system designed to capture high-quality real-time video and audio while driving. It enhances road safety, serves as valuable evidence for insurance claims, and supports law enforcement in the event of traffic incidents.

Note:

The illustrations of the product, accessories, and user interface in this manual are for reference only. Due to product upgrades, the actual product may vary from the images shown. Please refer to the actual product for the final standard.

Device Hardware Interfaces

No. Action Function
1 Type-C Requires a USB Type-C connection to power the device.
2 Power Indicator LED Indicates whether the device is receiving power.
3 Working Indicator LEDs Indicates operational status of the device.
4 Microphone (MIC) Captures audio for recording and enables two-way communication.
5 Emergency Record Button Press this button to start emergency video recording.
6 SD Card Slot Insert the SD card to enable recording storage
7 Restart hole Restart the device.
8 Power Button Turn the device on or off.
9 SIM Card Slot Insert a nano SIM card.
10 Rear Camera Port Connect a rear camera to the device.
  1. Lock Button (When powered on)

    Action Function
    Single Press Locks the ongoing recording for data protection.
    Long Press (3 seconds) Switches to the Wi-Fi communication mode.
  2. Power On/Off Button

    Action Function
    Short press Short press to power on the device.
    Press and hold (3 seconds) Shut down the device.
    Press and hold (5 seconds) Format the SD card (a prompt sound will confirm the operation).
    Press and hold (10 seconds) Performs a Factory Reset of the dashcam (a prompt sound will confirm the operation).

    Note:The specific actions depend on the duration of the button press as described above.

  3. Restart Hole

    Action Function
    Short Press Restarts the device.

LED Behaviours

  1. Power-up Indicator

    Action Function
    Power On Red LED is constant
  2. Recording LED Indicator

    Action Function
    Red LED Blinks while in recording mode.
    No LED The recording does not happen.
  3. Wi-Fi LED Indicator

    Action Function
    Wi-Fi On but Not Connected Green light indicator stays constant.
    Wi-Fi Connected Green light indicator blinks.
  4. GPS LED Indicator

    Action Function
    GPS Receiving Data but not Positioned Green light indicator blinks.
    GPS Receiving Data and Positioned Green light indicator stays constant
  5. 4G LED Indicator

    Action Function
    4G Network Connected Green light indicator stays constant.
    App Connected Green light indicator blinks
  6. Firmware Update

    Action Function
    Firmware Update Red LED blinks frequently.

Installation Process

STEP 1

Install electrostatic stickers

  • Place the electrostatic sticker on the windshield within the designated dotted area.

    Note: Avoid placing the sticker near the edges of the glass and choose a clean, smooth surface for installation.

  • Before installing, thoroughly clean the glass to ensure proper adhesion.
  • During installation, press out any air bubbles between the electrostatic sticker and the glass for a smooth finish.

STEP 2

Front Dashcam Installation

    Peel off the protective tape from the high-temperature adhesive on the base of the mounting bracket, then align and place the dashcam within the dotted frame of the electrostatic sticker.

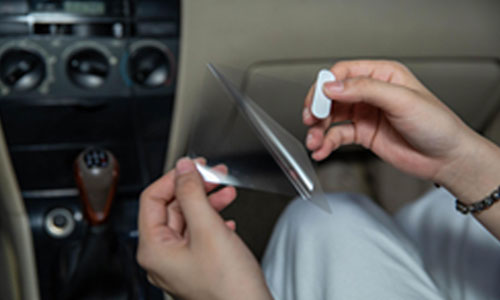
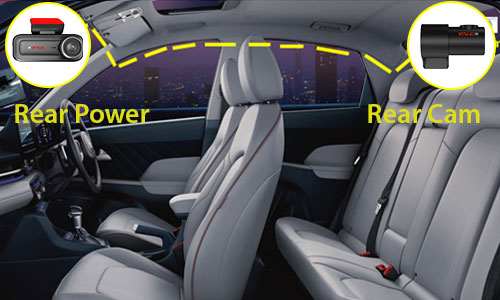
Rear Camera Installation

STEP 1

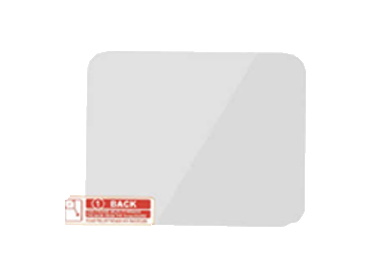
Electrostatic Sticker Installation

Tear off the small electrostatic sticker and attach it to the center of the rear windshield to install the rear camera.

Note: 
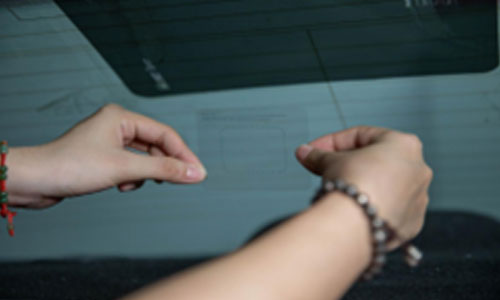
Install the rear camera at the top of the back windshield. Before installation, remove any foreign matter and ensure the windshield is clean and dry
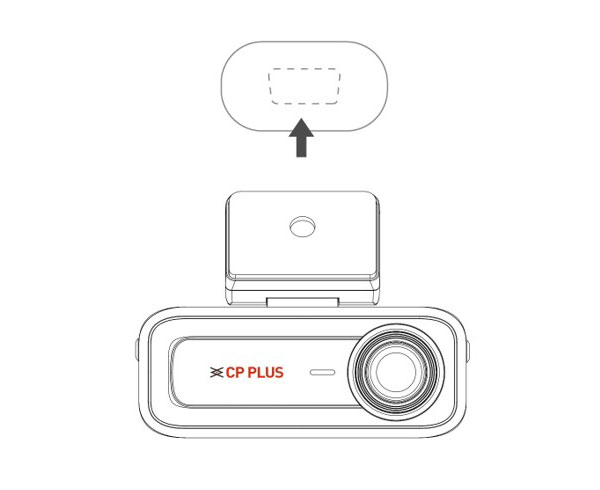
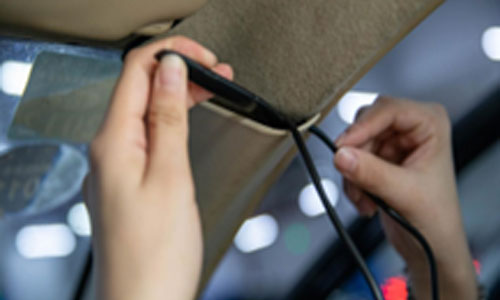
STEP 2

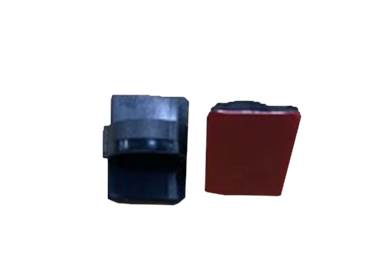
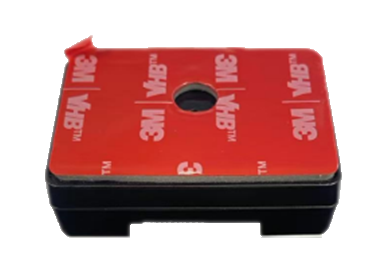
Mounting Rear Camera

Tear off the 3M tape back cover from the rear camera, attach the camera onto the small electrostatic sticker, and adjust the device angle as needed.
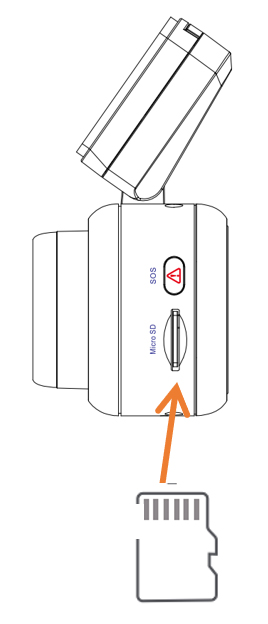
Cabling and Power Connectivity

Front & Rear Camera

  • For Front camera: Route the power supply cable along the top edge of the windshield. Then, connect the charging head to the car charger and securely insert it into the cigarette lighter socket. After that, use the pry tool to install the cable and hide it for a clean, invisible finish.

  • For Rear camera: Use the pry tool to carefully lift the edge of the roof lining and tuck the cable underneath. Ensure the cable is securely hidden along the edge to prevent it from hanging down or obstructing the driver’s view.

    Note:The cigarette lighter's location varies by vehicle model; the figure is for reference only.

    Note:If you are using CP-H27, no need to follow rear camera cabling & installation instructions.

SD Card

Insert the SD card into the SD card slot connector with the contact side facing up. You will hear a “click” sound when the SD card is properly inserted.

Note: Once a compatible SD card is inserted, the dashcam will automatically starts recording.

Power On/Off Methods

Power On

The dashcam supports the following power-on methods:

  • Cigarette Lighter (Car Charger): The dashcam automatically powers on when the vehicle starts.
  • Hardwire Kit: Choose the Hardwire kit to give power to device and using it you can monitor your vehicle under parking mode.
  • Note: The hardwire kit must be purchased to enable parking mode. It connects directly to the vehicle's fuse box.

Power Off

The dashcam supports the following power-off methods:

  • Press and hold the power button for 3 seconds to turn off the dashcam manually.
  • When the vehicle is turned off, the dashcam will automatically power off.

Frequently Asked Questions

  1. How do I know the 4G Network is connected to the Dashcam?

    Once a compatible SIM card with an active data plan is inserted, the device connects to the internet via 4G network and a voice prompt stating, "4G Network Connected."

  2. Can I share the device with family and friends?

    Yes, you can share your camera with family and friends who have access to view the camera.

  3. How do I reset my dashcam to factory settings?

    To reset the device, press and hold the power button for 10 seconds.

  4. How to unbind the device?

    Please follow the steps below to unbind the device:

    • 1. Reset the device by holding the power button for 10 seconds.
    • 2. Register and login with a new email ID in the ezyLiv+ application.
    • 3. Follow the device-adding process.
    • 4. During the process, it will show that the device is already bound to another account. You need to click on Apply for Unbinding and share your feedback (enter “unbind this device” with your mobile number or email ID).
    • 5. Share the feedback ID snapshot with us.

Technical Specifications

  • Resolution:
    CP-H27B=2MP (1920 x 1080P) @25fps + 2MP (1920 x 1080P) @25fps, H.265 encoding
  • Field of view:
    CP-H27/B=Front (H=115°, D=136°, V=61°), *Rear (H=102°, D=124°, V=53°)
  • Storage: Supports up to 1TB microSD card (not included)